How to Make a Box Joint Jig for Router Table?
A router table jig is a way to go if you’re looking for a way to create perfectly fitting box joints. This handy tool can quickly create impressive joints for everything from woodworking projects to picture frames.
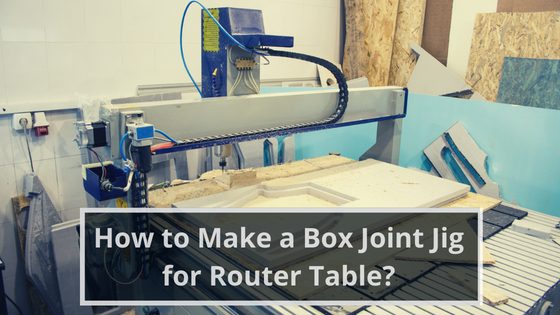
How to Make a Box Joint Jig for Router Table?
Making a box joint jig for your router table is a simple way to make complex joint cuts quickly and easily. The jig consists of a piece of wood the same width as your router bit and a pair of blocks that fit over the bit and the wood you’re working on.
Building a box joint jig is a relatively simple process, and with this step-by-step guide, you’ll have yours up and running in no time. Once you’ve built your jig, you can use it repeatedly for future woodworking projects.
See Also: How to Use a Roundover Bit on a Router Table?
Step-by-Step Guide
A box joint jig for your router table is a handy tool to have around when you need to make quick, precise cuts. Here’s what you’ll need to make your own:
- A router table
- A plunge router
- A straight bit
- A fence for your router table
- A miter gauge
- A piece of scrap wood
- Some clamps
Step 1: Cut the Base and Fence Pieces
To make a box joint, you must cut the base piece and two fence pieces to the dimensions in the drawing. The base piece is 3/4″ x 5-1/2″ x 18″, and the fence pieces are 3/4″ x 4″ x 18″.
You can use a table, mitre, or circular saw to cut the lumber to size, but it may be more difficult to get accurate cuts without a table or miter saw.
Once the lumber is cut to size, you will need to cut slots in the base piece for the stops that determine the width of the box joint.
These slots can be cut with a 1/4″ spiral upcut bit in a router table, a Dremel tool, or a hand drill, but it will be more difficult and time-consuming to cut the slots without a router table. Mark the locations of the slots on the base piece as shown in the drawing, and then cut the slots.
Step 2: Assemble the Base
Now that you have assembled the base of your jig, it’s time to attach the router table. First, make sure that the router table is level and secure.
Next, attach the jig to the router table using the screws provided. Once the jig is connected, you can start routing your box joints.
Step 3: Assemble the Fence
Now that you have assembled the base and fence, it’s time to put them together to create your box joint jig.
Start by attaching the base to your router table using screws or bolts. Then, attach the fence to the base. Make sure that the fence is level with the table surface.
Next, you will need to install a router bit into your router. We recommend using a 1/4″ spiral upcut bit for this project. Once the bit is installed, you’re ready to start making joints!
Step 4: Attach the Fence to the Base
Now that your box joint jig is set up, it’s time to attach the fence. The fence is what will guide your router bit as it cuts the slots for the box joints.
Start by attaching the fence to the base of the jig. You’ll want to ensure the fence is level with the base, so use a spirit level to check it. Once you’re happy with the position of the fence, use screws to secure it.
Next, you’ll need to attach a guide bushing to the router. This is what will guide the router bit as it cuts into the wood.
There are different sizes of guide bushings available, so make sure to get one compatible with your router. Once the guide bushing is attached, you’re ready to start cutting some box joints!
Step 5: Cut the Slots for the T-Track
Now it’s time to cut the slots for the T-track. The bit I used in my router table was a 1/4″ up spiral bit. You could also use a plunge router and a straight bit.
First, make a test cut in a piece of scrap wood to make sure the bit is set at the correct height. You want the bit to be high enough to cut through the wood but not so high that it cuts into the router tabletop.
Next, adjust the fence on your router table so it is about 3/8″ away from the bit. Then, make a pass over the T-track with the router bit. Be sure to hold the T-track securely in place as you do this.
After you’ve made the initial cut, adjust the fence so that it is about 1/4″ away from the bit. Then, make another pass over the T-track. This will create a slot that is the perfect width for the T-track bolts.
Step 6: Install the T-Track
The first thing you need to do is to attach the T-track to the MDF board. You can do this by using screws or by using adhesive. We recommend using screws for a stronger hold.
Next, you need to attach the fence to the T-track. You can do this by using bolts or welding the two pieces together. We recommend using bolts for a stronger hold.
Finally, you need to attach the guide rail to the fence. You can do this by using screws or welding the two pieces together. We recommend using screws for a stronger hold.
Step 7: Attach the Jig to the Router Table
To make a box joint jig for your router table, you will need the following materials:
- A piece of plywood or MDF that is at least 12″ wide and 24″ long
- A straight edge or fence that can be attached to the plywood or MDF
- A clamp or two to hold the plywood or MDF in place on the router table
- A drill
- 1/4″ dowel pins (optional)
To make the jig, start by attaching the straight edge or fence to the plywood or MDF. Then, clamp the plywood or MDF to the router table.
Drill four holes in the plywood or MDF, evenly spaced apart. These holes will be used to attach the jig to the router table.
Next, take two dowel pins and insert them into two of the holes. These dowel pins will help to keep the jig from moving when you are using it.
If you do not have dowel pins, you can skip this step. Now, your box joint jig is ready to use! To use it, clamp it onto your workpiece and rout away.
Conclusion
In conclusion, A box joint jig is an excellent tool for making box joints for picture frames, furniture, and other woodworking projects. You’ll need a box joint jig to make a box joint.
The following guide will guide you through the process of building one. You can use this jig over and over again for all of your future woodworking projects.